Exercise of the Week - Weighted Single Leg Calf Raise

23Sept15 - EoW WTSingleLegCalfRaise.gif

Instructions

Preparation

Hang weight from dip belt around waist. Position toes and ball of foot on calf block end of platform with heel and arch extending off. Place hand or hands on support for balance. Lift other leg to rear by bending knee.

Execution

Raise heel by extending ankle as high as possible. Lower heel by bending ankle until calf is stretched. Repeat. Continue with opposite leg.

Comments

Keep knee straight throughout exercise or bend knee slightly only during stretch. Quadriceps serve as synergists muscle if knee is bent slightly during stretch. Use lighter load if you need to assist with hands used for support. See Calf Exercise Analyses.

Classification


 Utility:Basic or Auxiliary

 Mechanics:Isolated

 Force:Push


Muscles

Target

Synergists

Stabilizers

Source

Chicken Breast with Shaved Brussels Sprouts

Ingredients

  • 2 (8-ounce) boneless, skinless chicken breast halves
  • 3/4 teaspoon kosher salt, divided
  • 2 broccoli stems
  • 2 tablespoons olive oil
  • 2 tablespoons fresh lemon juice
  • 1/4 teaspoon freshly ground black pepper
  • 3 cups thinly sliced Brussels sprouts (from 12 medium)
  • 2 celery stalks, thinly sliced
  • 1/4 cup toasted hazelnuts
  • 1/4 cup fresh flat-leaf parsley, coarsely chopped
  • Parmesan cheese, coarsely grated

Preparation

1. Place chicken and 1/2 teaspoon salt in a small saucepan and cover with water; bring to a boil. Immediately remove from heat, cover, and let stand 15 minutes. Drain chicken and run under cold water. Cool completely; set aside. Using 2 forks, shred into bite-size pieces; reserve.

2. Meanwhile, use a vegetable peeler to remove outer layer of broccoli stems; discard. Continue peeling stems into long strips. In a large bowl, whisk together oil, lemon juice, and 1/4 teaspoon each salt and pepper. Add broccoli strips, Brussels sprouts, celery, hazelnuts, parsley, and reserved chicken to bowl with dressing; toss. Divide among 4 shallow bowls. Top with cheese.


Source

Exercise of the Week - Dumbbell Lying Row

Instructions

Preparation

Lie chest down on elevated bench. Grasp dumbbells below.

Execution

Pull dumbbells to sides until upper arm is just beyond horizontal or height of back. Return until arms are extended and shoulders are stretched downward. Repeat.

Comments

Bench should be high enough to allow shoulders to stretch forward without dumbbells hitting floor.

Classification


 Utility:Basic

 Mechanics:Compound

 Force:Pull


Muscles

Target

  • Back, General

Synergists

Dynamic Stabilizers


Source

Recipe of the Week - One Pot Greek & Lemon Rice

11Sept15 - RoW - One-Pot-Greek-Chicken-Lemon-Rice-Overhead_680px1.jpg

ONE POT GREEK CHICKEN & LEMON RICE

PREP TIME 10 mins COOK TIME 50 mins TOTAL TIME 1 hour

This is not an authentic Greek dish (as far as I know!) but it is made using classic Greek ingredients. The beauty of this is that it is all made in one pot / pan. Cooking the rice with the chicken on top adds extra flavour to the rice because the chicken juices get soaked up by the rice.

Author: Nagi | RecipeTin Eats

Recipe type: One Pot, Chicken

Cuisine: Greek

Serves: 5

INGREDIENTS

Chicken and Marinade

  • 5 chicken thighs, skin on, bone in (Note 1)
  • 1 - 2 lemons, zest + 4 tbsp lemon juice
  • 1 tbsp dried oregano
  • 4 garlic cloves, minced
  • 1 tsp salt

Rice

  • 1½ tbsp olive oil, separated
  • 1 small onion, finely diced
  • 1 cup long grain rice (Note
  • 1½ cups chicken broth / stock
  • ¾ cup water
  • 1 tbsp dried oregano
  • 1 tsp salt
  • Black pepper

Garnish

  • Finely chopped parsley or oregano (optional)
  • Fresh lemon zest (highly recommended)

INSTRUCTIONS

  1. Combine the Chicken and Marinade ingredients in a ziplock bag and set aside for at least 20 minutes but preferably overnight.

To Cook

  1. Preheat oven to 180C/350F.
  2. Remove chicken from marinade, but reserve the Marinade.
  3. Heat ½ tbsp olive oil in a deep, heavy based skillet (Note 2) over medium high heat.
  4. Place the chicken in the skillet, skin side down, and cook until golden brown, then turn and cook the other side until golden brown. Remove the chicken and set aside.
  5. Pour off fat and wipe the pan with a scrunched up ball of paper towel (to remove black bits), then return to the stove.
  6. Heat 1 tbsp olive oil in the skillet over medium high heat. Add the onion and sauté for a few minutes until translucent. Then add the remaining Rice ingredients and reserved Marinade.
  7. Let the liquid come to a simmer and let it simmer for 30 seconds. Place the chicken on top then place a lid on the skillet (Note 3). Bake in the oven for 35 minutes. Then remove the lid and bake for a further 10 minutes, or until all the liquid is absorbed and the rice is tender (so 45 minutes in total).
  8. Remove from the oven and allow to rest for 5 to 10 minutes before serving, garnished with parsley or oregano and fresh lemon zest, if desired.

NOTES

1. I use bone in, skin on chicken thighs because there's more flavour. But you can use skinless, boneless chicken thigh fillets if you prefer. If you do that, place the chicken in the pan 20 minutes into the baking time because the chicken won't need as long.

2. The fry pan I used was 26cm / 10" in diameter and 6cm/2.4" deep. It's the perfect size for this.

3. I don't have a lid for the fry pan I used but I have a lid for a larger pot which I just placed on top. Otherwise, foil works just fine, or even a baking tray.

4. I garnished this with slices of lemon which I seared in the pan after cooking the chicken.

5. How to make this entirely on stove top (readers' request). Though the result isn't quite the same as baking because you sacrifice either the chicken juices mixing in with the rice OR the crispy skin, it can be made entirely on the stove. There are two options: 

a) Cook the chicken completely on the stove, set aside and cook the rice on the stove (reduce the liquid by ½ cup). To cook the rice, just follow the recipe directions up to the point just before putting it in the oven. Instead of doing that, put the lid on and cook on medium low until the liquid is absorbed (about 12 - 15 minutes). When the rice is almost ready, pop the chicken back in on top of the rice and put the lid on to warm up, and finish cooking the rice. This will yield a chicken with crispier skin than the second method. 

b) The 2nd method is to sear the chicken but not cook it through, then pop it on to of the rice to finish cooking while the rice cooks. This method is easier and you will get the benefit of the chicken juices mixing in with the rice while it cooks but you will lose the crispiness of the skin.

What I would suggest is using skinless, boneless thigh fillets instead, that way you don’t have to worry about the skin crispiness but you get all the flavour!

6. This recipe will work with long grain, medium and short grain rice but I recommend long grain because it is the least sticky of the three types. It will also work with jasmine, normal brown rice, wild rice and normal basmati rice. But NOT brown basmati rice (takes much longer to cook). Risotto and paella rice are also not recommended.


Nutrition per serving (5 servings) assumes this is made using trimmed bone in, skin on chicken thigh fillets. It does not take into account the fat that is poured out of the pan after searing the chicken, which means the calories per serving are higher than they actually are.


Source

Exercise of the Week - Pike Press

Instructions

Preparation

Kneel on two benches positioned side by side slightly apart at end nearest head. Place hands on ends of benches. With forefeet on opposite ends of bench, raise rear end high up with arms, back, and knees straight. Adjust feet so they are somewhat close to hands while keeping back and legs straight.

Execution

Lower head between ends of benches by bending arms. Push body back up to original position by extending arms. Repeat.

Comments

Pike Press (for front delts) differs from Pike Push-up (for upper chest) in that, feet are at closer distance to hands so body is more inverted in lowest position. Keep knees and back straight. A slight curve (spinal flexion) is acceptable if hamstrings are tight.

Easier

Resistance can be reduced by performing exercise on bench or apparatus with hands positioned higher than feet. Keep in mind, this specialized movement may not be necessary since front delts can be utilized somewhat during pushup and dip movements, particularly with elbows positioned inward:

Harder

For greater challenge, elevate feet.

Classification


 Utility:Basic

 Mechanics:Compound

 Force:Push


Muscles

Target

Synergists

Dynamic Stabilizers

Stabilizers

Source

Recipe of the Week - Huevos Ranchero with Queso Fresco

Ingredients

  • 1 (10-ounce) can diced tomatoes and green chiles, undrained
  • 1 (10-ounce) can red enchilada sauce
  • 1/3 cup chopped fresh cilantro
  • 1 tablespoon fresh lime juice
  • 2 tablespoons water
  • 1 (16-ounce) can pinto beans, rinsed and drained
  • Cooking spray
  • 4 large eggs
  • 4 (8-inch) fat-free flour tortillas 
  • 1 cup (4 ounces) crumbled queso fresco cheese

Preparation

  1. Combine the tomatoes and enchilada sauce in a medium saucepan; bring to a boil. Reduce heat; simmer 5 minutes or until slightly thick. Remove from heat; stir in cilantro and juice. Set aside.
  2. Place water and beans in a microwave-safe bowl, and partially mash with a fork. Cover and microwave at HIGH 2 minutes or until hot.
  3. Heat a large nonstick skillet coated with cooking spray over medium-high heat. Add eggs; cook 1 minute on each side or until desired degree of doneness.
  4. Warm tortillas according to package directions. Spread about 1/3 cup beans over each tortilla; top each tortilla with 1 egg. Spoon 1/2 cup sauce around each egg; sprinkle each serving with 1/4 cup cheese.

Source

Exercise of the Week - Cable Seated Cross Arm Twist

Instructions

Preparation

Grasp stirrup from medium height cable pulley with far hand. Sit on stool or straddle bench with lower body facing away from pulley. Allow torso to turn to side of near arm. Place far arm across body onto near arm. Support far elbow with near hand.

Execution

Rotate torso through waist to face opposite side until slight stretch if felt. Return to original side until slight stretch is felt. Repeat. Continue with opposite side.

Comments

Place feet wide for support, or if straddling bench, slightly squeeze legs on sides of bench to prevent shifting. Upper body stabilizing occurs primarily on far side through isometric shoulder abduction and isometric scapular upward rotation. Upper body stabilization also occurs somewhat on near side through shoulder protraction. See Spot Reduction Myth.

Classification


 Utility:Auxiliary

 Mechanics:Isolated

 Force:Pull


Muscles

Target

Synergists

Stabilizers

Source


Exercise of the Week - Seated Medicine Ball Trunk Rotations

Step 1

Starting Position: Sit on a mat/floor with your knees bent, feet together, and heels on the floor. Start with a light ball (1-2 lb) and increase the weight of the ball as your fitness level improves. Sit as tall as possible with your back erect so that your torso is perpendicular to the floor. If you have tightness in your back and legs that prevents you from getting into this position, try sitting on a cushion or a rolled mat in order to lift your hips and help facilitate a straighter spine. Hold themedicine ball close to your body between your navel and your ribcage. Use your breath to help engage the muscles of your core. On your exhale, imagine you are tightening a belt around your waist and deepen the contraction of the abdominals.


Step 2

Rotation: Keeping the spine erect, exhale and slowly rotate your torso to one side, Imagine that the ball is buttoned to your torso. It should stay in place through the entire exercise. Do not allow the ball to drop toward the floor. Pause briefly at the end of the twist, inhale and then gently exhale while rotating completely to the opposite side. Repeat the movement back and forth.


Step 3

Exercise Progression 1: When you can perform the movements in Step 2 easily and without strain, you can modify the starting position by slightly leaning back while keeping your knees bent and heels on the floor. Once again, keeping the ball buttoned to your torso, try to enhance rotation so that the elbow is close to, but not to resting on the floor. Keep your core and abdominal muscles active to prevent arching the back or low back discomfort during the exercise. This exercise variation increases the demands placed upon your abdominal muscles.


Step 4

Exercise Progression 2: As you continue to progress, you can incorporate even greater challenge by modifying the starting position once again. Lean back halfway to the floor and lift your feet off the floor. Keep your knees bent and feet together. Once again keeping the ball buttoned to your torso, enhance the rotation by attempting to bring the elbow close to, but not to resting on, the floor. Try to keep the shoulders relaxed. Your back should remain straight. Keep your core and abdominal muscles active to prevent arching the back or low back discomfort during the exercise. This exercise variation increases the demands placed upon your abdominal muscles.
Intermediate and advanced rotational exercises should only be attempted after completing the beginner exercises.


Source

Exercise of the Week - Stability Ball Wall Squat

Check out this perfect beginner exercise for isolating your butt, hips, and Legs (Thighs) and all your need is a wall and a ball.

Step 1

Starting Position: Place a stability ball against a wall and gently lean against it, positioning the top of the ball into the small of your back, but making contact with your tailbone, low- and mid-back. Your feet should be positioned 6 - 12" out in front of your body, feet hip-width apart with toes facing forward or turned out slightly.


Step 2

Pull your shoulders blades down and back. Do not allow your low back to pull away from the ball. Gently lean into the ball, as you shift your weight into your heels. Place your hands on the front of your thighs.


Step 3

Downward Phase: Inhale. Keep the tailbone, low and mid-back against the ball as you bend your knees, and begin to lower the body. Push back with your hips, allowing them to drop under the ball. The ball will glide down the wall with you as you lower your body toward the floor. Do not move the feet. Keep your knees lined up with your 2nd toe. Continue to lower yourself until challenged or until your thighs align parallel to the floor. Hold this position briefly.


Step 4

Upward Phase: Exhale and slowly push your body up away from the floor. Extend your hips to bring them back underneath your body. Continue pushing upward, returning to your starting position.
To help develop the foundations of good squatting form, emphasize dropping your hips down and slightly under the ball, and avoiding driving your knees down and forward.

Source

Recipe of the Week - Good Frickin' Paprika Chicken

Ingredients

Original recipe makes 6 servingsChange Servings

  • 6 tablespoons plain yogurt
  • 3 cloves garlic, crushed
  • 3 tablespoons ground paprika
  • 2 tablespoons olive oil
  • 1 tablespoon hot chile paste (such as sambal oelek)
  • 1 pinch cayenne pepper
  • 1 (5 pound) whole chicken, cut into 8 pieces
  • salt
  • 1/4 cup olive oil
  • 2 tablespoons sherry vinegar
  • 1 tablespoon ketchup
  • 1/8 teaspoon hot chile paste (such as sambal oelek)

  • 1 pinch paprika

  • salt and pepper to taste


PREP - 10 mins | COOK - 10 MIns | READY IN  - 3 hrs 20 mins

Directions

  1. Whisk together yogurt, garlic, 3 tablespoons paprika, 2 tablespoons olive oil, 1 tablespoon hot chile paste, and cayenne pepper in a large bowl.
  2. Mix in chicken pieces and toss to evenly coat. Cover the bowl with plastic wrap and marinate in the refrigerator for 3 hours.
  3. Preheat an outdoor grill for medium-high heat, and lightly oil the grate.
  4. Remove chicken from the bag and transfer to a plate or baking sheet lined with paper towels. Pat chicken pieces dry with more paper towels. Season with salt.
  5. Combine 1/4 cup olive oil, sherry vinegar, ketchup, 1/8 teaspoon hot chile paste, pinch paprika, salt, and pepper in a small bowl. Set aside.
  6. Grill chicken, skin-side down, on the preheated grill for 4 minutes with grill lid closed.
  7. Turn chicken and grill with lid closed until well-browned and meat is no longer pink in the center, about 6 minutes. An instant-read thermometer inserted into the thickest part of the thigh should read 180 degrees F (82 degrees C).
  8. Spoon sherry vinegar mixture over cooked chicken and serve.

Source

Recipe of the Week - Baked Salmon

  • PREP 15 mins

  • COOK 45 mins

  • READY IN 2 hrs

Ingredients

Original recipe makes 2 servings2 cloves garlic, minced

  • 6 tablespoons light olive oil
  • 1 teaspoon dried basil
  • 1 teaspoon salt
  • 1 teaspoon ground black pepper
  • 1 tablespoon lemon juice
  • 1 tablespoon fresh parsley, chopped
  • 2 (6 ounce) fillets salmon

Directions

  1. In a medium glass bowl, prepare marinade by mixing garlic, light olive oil, basil, salt, pepper, lemon juice and parsley. Place salmon fillets in a medium glass baking dish, and cover with the marinade. Marinate in the refrigerator about 1 hour, turning occasionally.
  2. Preheat oven to 375 degrees F (190 degrees C).
  3. Place fillets in aluminum foil, cover with marinade, and seal. Place sealed salmon in the glass dish, and bake 35 to 45 minutes, until easily flaked with a fork.

Source


Exercise of the Week - Lunge with Elbow Instep

Step 1

Starting Position: Stand with your feet hip width apart. Pull your shoulders down and back without arching your low back, and engage your abdominals to stabilize your spine.


Step 2

Begin to step forward slowly by lifting the right foot off the floor. Find your balance on the standing leg. Control any sideways tilting or swaying in your upper body by keeping the abdominals contracted and the standing foot pressed firmly into the ground. Hold this position briefly before reaching forward with the right foot. The right (swing) foot should contact the floor heel first. Slowly shift your body weight to the right foot, which is now placed firmly on the floor. Begin to lower yourself into the right leg. Keep your spine straight and your torso leaning slightly forward from the hips. Lower your right elbow on the inside of your right knee.


Step 3

As you continue to lower yourself into the lunge, your hips should drop toward the floor. Try not to allow your hips to drive forward. This will help control the amount of forward movement of your shinbone over your foot. Place both hands on the floor. The right hand should be slightly forward of the left. Continue lowering your body to a comfortable position or until your front thigh is parallel with the floor and your shinbone is in a slight forward lean. Holding this position, push back through the left foot to lengthen and increase the stretch on the front side of the left hip. Keep the abdominals braced in order to stabilize the pelvis and enhance the stretch on the left hip flexor.


Step 4

Maintaining your core engagement, push your hands into the floor and begin to return to start position. With the right (forward) foot firmly into the ground, press backwards to straighten the right knee and hip, bringing yourself forward into a standing position. Keep your chest lifted and abdominals braced to maintain a straight spine and level pelvis as you begin to swing the left leg forward to initiate the next repetition.


Step 5

Continue the exercise for a specific number of repetitions or over a certain distance of travel.


Step 6

Exercise Variation: to add a stretch before before stepping into the next lunge, lean back to straighten the right leg and stretch the right hamstrings. Alternate with both legs.


Focus on maintaining the abdominal bracing through the entire range-of-motion of the movement to keep the spine stable and pelvis level.

Source

Recipe of the Week - Simple Roast Chicken

Makes: 8 servings

Active Time: 15 minutes

Total Time: 2 hours 20 minutes

INGREDIENTS

  • 1 small onion, peeled and quartered
  • 3 cloves garlic, peeled and quartered
  • 3 sprigs fresh tarragon
  • 3 sprigs fresh thyme
  • 1 5-pound chicken, giblets removed
  • 2 tablespoons extra-virgin olive oil
  • 1 teaspoon kosher salt
  • 1/2 teaspoon freshly ground pepper

PREPARATION

  1. Preheat oven to 375°F.
  2. Place onion, garlic, tarragon and thyme into the cavity of the chicken. Tie the legs together with kitchen string, mostly closing the cavity opening. Pull the wings so the tips overlap on top of the breast; tie in place, wrapping string around the wings and body. Rub the chicken with oil, salt and pepper. Set in a roasting pan, breast-side down.
  3. Roast the chicken for 25 minutes. Turn breast-side up and continue roasting, basting occasionally with pan juices, until a thermometer inserted into the thickest part of the thigh, without touching bone, registers 175°F, 1 1/4 to 1 1/2 hours. Transfer to a cutting board; let rest for 10 minutes. Remove the string before carving.

TIPS & NOTES

Make Ahead Tip: Equipment: Kitchen string

Roasting Tips

1. Very cold meat won't roast evenly. Place it on the counter while preheating the oven.

2. Durable cotton kitchen string is sold at kitchenware stores, most gourmet markets and large supermarkets. Do not use sewing thread or yarn, which may contain inedible dyes or unsavory chemicals.

3. A heavy-duty, high-sided roasting pan is essential for conducting heat evenly. Never substitute a cookie sheet. A broiler pan will work in a pinch, but the roast will inevitably be somewhat chewier.

4. Give it a rest. A roast's internal temperature will rise about 10 degrees while resting. The natural juices will also reincorporate into the meat's fibers and the skin or crust will dry out slightly for a more toothsome yet more succulent dinner.

NUTRITION

Per 3-ounce serving (without skin): 180 calories; 9 g fat (2 g sat, 5 g mono); 64 mg cholesterol; 1 gcarbohydrates; 0 g added sugars; 21 g protein; 0 g fiber; 300 mg sodium; 217 mg potassium.

Source

Exercise of the Week - Cable Seated Cross Arm Twist

Instructions

Preparation

Grasp stirrup from medium height cable pulley with far hand. Sit on stool or straddle bench with lower body facing away from pulley. Allow torso to turn to side of near arm. Place far arm across body onto near arm. Support far elbow with near hand.

Execution

Rotate torso through waist to face opposite side until slight stretch if felt. Return to original side until slight stretch is felt. Repeat. Continue with opposite side.

Comments

Place feet wide for support, or if straddling bench, slightly squeeze legs on sides of bench to prevent shifting. Upper body stabilizing occurs primarily on far side through isometric shoulder abduction and isometric scapular upward rotation. Upper body stabilization also occurs somewhat on near side through shoulder protraction. See Spot Reduction Myth.

Classification


 Utility:Auxiliary

 Mechanics:Isolated

 Force:Pull


Muscles

Target

Synergists

Stabilizers

Source

Recipe of the Week - Herb Lamb Roast with Wilted Greens

  • reparation time:10 minutes
  • Cooking time:40 minutes
  • Total time:50 minutes

Serves: 4

Ingredients

2 x 550g pack Waitrose British roasting vegetables
250g lamb neck or loin fillet, trimmed
1 tbsp Dijon mustard
2 tbsp chopped parsley
2 tbsp chopped thyme
200g pack Waitrose baby leaf greens, trimmed and thickly sliced
500g pot Waitrose lamb gravy, warmed, to serve

Method

1. Preheat the oven to 220°C, gas mark 7. Remove the film from the roasting vegetables and cook in the centre of the oven for 35 minutes.

2. Meanwhile, spread the lamb with mustard and roll in the herbs. When the vegetables have been in the oven for 20 minutes, top with the lamb and roast for a further 15 minutes.

3. Remove the lamb and place on a board to rest for 5 minutes. Leave the veg in the oven for a further 5 minutes until golden and cooked through.

4. Meanwhile, cook the baby leaf greens in a pan of boiling water for 4-5 minutes until tender, then drain well.

5. Divide the roasted veg between 4 plates and top with the greens. Slice the lamb thinly and arrange on top.

Pour round the gravy and serve.

Source

Exercise of the Week - Stability Ball Dumbbell Fly

Step 1

Starting Position: Sit on the stability ball holding each dumbbell with your thumbs wrapped around the handles and your feet flat on the floor. Slowly begin walking your feet forward as you tuck your tail under, lowering your spine onto the ball as you walk your feet away from the ball until your head, shoulders and upper back are resting on the ball. Feet should be parallel and shoulder width apart. Knees are bent to about 90 degrees with your thighs and torso at or nearly parallel to the floor. Distribute your weight evenly through your feet.


Step 2

Pull your shoulders down and back until you feel your shoulder blades hugging the ball. Position the dumbbellsnear your chest and armpits with your palms facing one another. Keep the wrist in a neutral position (straight, not bent).


Step 3

Exhale, engage your abdominal/core muscles ("bracing") to stabilize your spine. Slowly press the dumbbells upward to a position directly above your chest. Arms should be shoulder-width apart or closer, with your elbows straight but not locked. Throughout the movement remember to keep your feet pressed into the ground and the hips pushed up towards the ceiling. This will create stability for your body during the movement.


Step 4

Downward Phase: Inhale and slowly lower the dumbbells in a wide arc until the dumbbells are level with or near the height of your chest. Try to keep the dumbbells parallel with each other, a very slight bend in the elbows and wrists in neutral position (straight, not bent). Your head, shoulders and upper back should be resting on the ball, and your torso and thighs should be parallel with the floor at all times.

Upward Phase: Return the dumbbells toward the ceiling following the same soft arc pattern of the downward phase. Avoid the tendency to thrust your hips upwards and arch your back. Your torso and hips should remain strong and parallel with the floor throughout the exercise.

Source

Recipe of the Week - Sausage, Pepper, and Onion One Pot

TOTAL TIME:2 hr

Prep: 20 min

Inactive Prep: 1 hr

Cook: 40 min

YIELD:  4 servings

LEVEL: Easy

INGREDIENTS

  • pounds Italian hot and/or sweet sausages
  • tablespoons extra-virgin olive oil
  • 1 1/2 teaspoons fennel seed
  • red chile pepper, thinly sliced
  • cubanelle peppers, thinly sliced
  • red bell pepper, cored and thinly sliced
  • large red or yellow onions, thinly sliced
  • cloves garlic, thinly sliced
  • tablespoons tomato paste
  • 1/2 cup dry white wine
  • cup chicken stock
  • (15-ounce) can tomato sauce or stewed tomatoes
  • A generous handful flat-leaf parsley, finely chopped
  • A loaf ciabatta bread*
  • Cook's Note: Wrap the bread in plastic or freeze if not using within 24 hours

DIRECTIONS

Place the sausages in a high-sided skillet or Dutch oven and add 1-inch water and 1 tablespoon extra-virgin olive oil to the pan. Bring the mixture to a boil, then reduce the heat a bit and allow the water to boil away. The sausages will gently cook through in the water, and then the oil will crisp the casings up to a deep brown. Remove the sausages to a plate. 

Heat extra-virgin olive oil, a couple of turn of the pan, in the same skillet over medium-high heat, stir in fennel seed and chile pepper, then add in the peppers, onions, and garlic as you slice them, season with salt and pepper and cook 15 minutes to soften. Stir in the tomato paste 1 minute, then wine for 1 minute more. Add the chicken stock and canned tomatoes. Finish with parsley. 

Slice the sausages on an angle and add to the pot. Cover, cool completely, and store for a make-head meal. Reheat, covered, over moderate heat or in moderate oven. 

Crisp up chunks of bread in a warm oven just before serving for mopping up your plate!


Source

Exercise of the Week - Bosu Lateral Jumps

Step 1

Starting Position: Place a BOSU® balance trainer, blue dome side up, on a non-slip surface on the floor, 3-6" to your left. Stand with your feet hip-width apart or closer; arms by your sides. Pull your shoulders blades down and back toward your hips. "Brace" (engage your abdominal / core muscles) to stabilize your spine.


Step 2

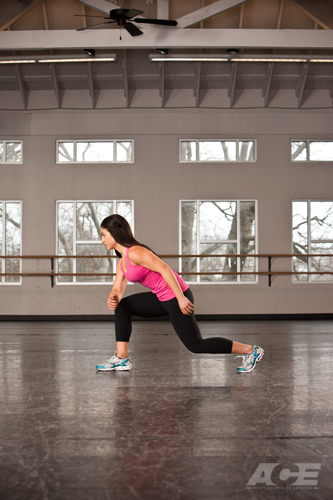
Downward Phase: Shift your hips back and down. This will create a hinge-like movement at your knees. Continue to lower yourself until you feel your heels about to lift off the floor. Try to maintain a flat back by bending forward at the hips. Keep your head facing directly forward and position your arms where they offer the greatest degree of balance support.


Step 3

Jumping Movement: With ONLY a slight pause at the bottom of your downward phase, explode up and to the left, landing on top of the BOSU. Try to fully extend the hips, knees and ankles as you explode on to the BOSU. As you jump into the air, try to keep your feet level with each other and parallel with the floor, but bring them together to land on the top of the BOSU.


Step 4

Landing: The most important components of the landing phase on a BOSU are correct foot position and avoiding excessive forward movement in your legs, which will cause additional stress on your knees.


Step 5

Try to land softly and quietly on the mid-foot, quickly rolling toward the heels in order to level the foot, making it parallel with the floor. Always push your hips backwards and drop your hips to absorb the jumping forces. Do not lock your knees on the landing in order to avoid potential knee injuries.


Step 6

Land with your trunk slightly forward, head aligned with your spine and back rigid or flat. Keep your abdominal / core muscles engaged; your torso rigid to protect your spine.


Step 7

With ONLY a slight pause at the bottom of your landing phase, explode up and to the left, off the top of the BOSUtoward the floor. Try to fully extend the hips, knees and ankles as you explode off of the BOSU. As you jump into the air, try to keep your feet level with each other and parallel with the floor, moving them back to a hip-width distance or slightly closer.


Step 8

Repeat the movement jumping to the right.

Exercise Variation: As you develop your jumping and landing skills, you can progress the exercise intensity and complexity by: (1) driving your arms behind you during the downward phase, (2) driving your arms forward, upward (towards an overhead position) and slightly sideways in the jumping direction during the jumping phases, (3)driving your knees towards your chest during the jumping phases or (4) moving back and forth more rapidly or adding more BOSU balance trainers and performing a series of jumps in each direction. 
Before attempting to jump laterally onto the BOSU, learn first how to squat and perform regular squat jumps, BOSU squat jumps and lateral cone jumps.


For professional guidance in your exercise program,
find an ACE-certified Personal Trainer in your area. Before beginning any fitness program, always see a qualified healthcare provider for advice and to address any questions or concerns. The exercises presented on this website are for suggestion only and should not be substituted for medical diagnosis or treatment. Participate at your own risk and stop if you feel faint or experience shortness of breath.

Source

Exercise of the Week - Safety Barbell Standing Calf Raise

Instructions

Preparation

Stand facing safety barbell on rack upper chest height and calf block on floor just below. Position toes and balls of feet on calf block with arches and heels extending off. Place hands on bar to each sides or on vertical rack bars. Position head in yoke with padded bar around shoulders. Dismount bar from rack by standing erect with safety bar, away yet close to rack.

Execution

Raise heels by extending ankles as high as possible. Lower heels by bending ankles until calves are stretched. Repeat.

Comments

Position rack just below lowest range of motion. Calf block should be positioned so safety bar is close to but does not make contact with rack. Keep knees straight throughout exercise or bend knees slightly only during stretch. Quadriceps serve as synergists muscle if knees are bent slightly during stretch. See Calf Exercise Analyses.

Classification


 Utility:Basic

 Mechanics:Isolated

 Force:Push


Muscles

Target

Synergists

Stabilizers

  • No significant stabilizers

Source

Recipe of the Week - California Melt

Ingredients

Original recipe makes 4 open-faced sandwiches

  • 4 slices whole-grain bread, lightly toasted

  • 1 avocado, sliced

  • 1 cup sliced mushrooms

  • 1/3 cup sliced toasted almonds

  • 1 tomato, sliced

  • 4 slices Swiss cheese

Directions

  1. Preheat the oven broiler.
  2. Lay the toasted bread out on a baking sheet. Top each slice of bread with 1/4 of the avocado, mushrooms, almonds, and tomato slices. Top each with a slice of Swiss cheese.
  3. Broil the open-face sandwiches until the cheese melts and begins to bubble, about 2 minutes. Serve the sandwiches warm.

Source